Abstract
Selective Laser Sintering (SLS) is an additive manufacturing process in which a powdered material is heated below its melting point and sintered using a high-intensity laser. The most useful application of this technology pertains to Direct Metal Laser Sintering (DMLS), which applies SLS technology to the production of strong, complex, metal 3D parts. A simple example to describe sintering is a glass of ice cubes at room temperature; although the ice cubes start as separate entities notice that they quickly attach to one another forming a large solid structure without undergoing a major phase change.
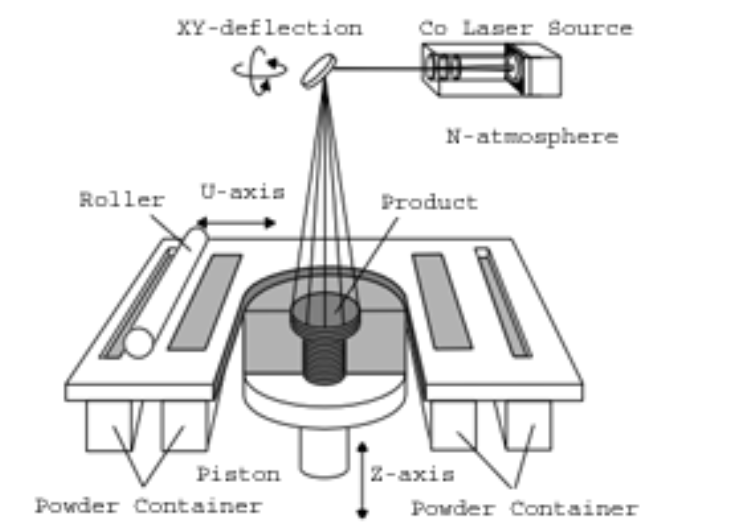
During the SLS printing process, a laser delivers energy to select points across a bed in the X, Y plane that is loaded with a thin layer of powder. Printers today either use a line vector or line raster drawing mechanism which involves moving the laser beam over powder in a series of lines. As the laser moves over points that are meant to be sintered it turns on, bonding those points together into a solid mass. Once the laser moves over points that are not part of the design, it turns off and those regions are left in powdered form. The result is a solid part that rests in a bed of un-sintered powder that can be easily separated from the part and reused in successive prints.
As the 3D industry expands, more vertical markets are in search of a 3D printer that can deliver a suitable quality print for their industry at the right price. And as such, new requirements are really pushing the envelope on SLS 3D printers.
This article will be focusing on those new requirements and discuss the optical limitations that all other SLS/SLM 3D printer manufacturers are facing. When most people think of 3D printing, they imagine a decorative three-dimensional trinket; however, in the SLS/SLM world, this couldn’t be further from the truth. This technology isn’t about printing a decorative 3D lamp, it’s about printing a replacement part for your antique car, a rocket exhaust valve, or even an anvil.

Galvanometers in the SLS Service
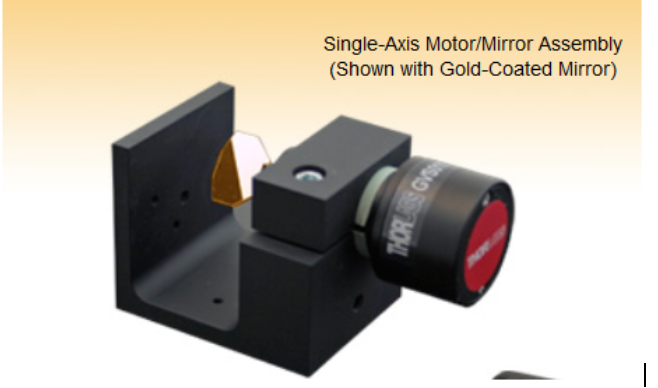
Practically all SLS printers on the market today operate using a Galvanometer-based print-head to achieve optical motion in the X and Y while keeping the laser stationary. A Galvanometer is essentially an oscillating (it’s not really rotating as moving back and forth) mirror driven by a motor that deflects light from a laser in a straight line. However, the use of Galvanometers for 3D printing can be quite problematic as there are several fundamental issues in regards to laser intensity and speed that arise from its use.


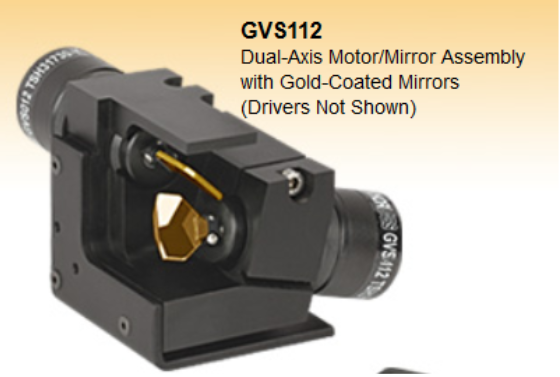
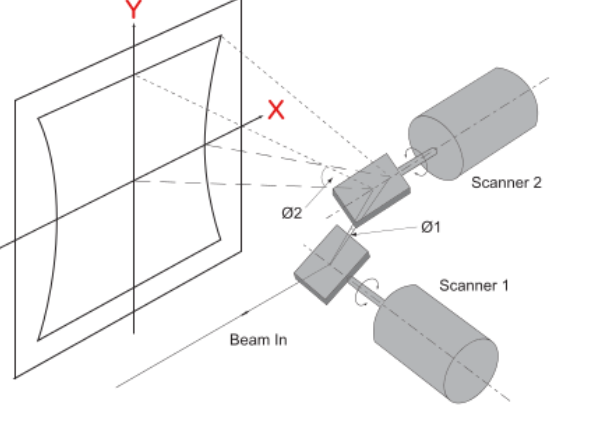
Galvanometers typically have a set of two mirrors, one for the X direction and one for the Y direction. The device is controlled by servo motors that typically use a closed-loop motor that is capable of positioning the mirror within ~10 microradians of the motor rotation, and when this ~10 micro radians then gets reflected on the print surface, it will be reflected as 20 micro radians (Geometry). If the print surface is a distance of L from the Galvanometer the error can be calculated by:
Error=L*tan(aiming angle±20 microradian)
As such, if the print surface is 500mm from the galvanometer than it will reflect an error of 0.010 mm or 10 micrometers. Although this is relatively small compared to the print size, it’s not small relative to the diameter of the laser beam thereby limiting the print beam diameter. In other words, the beam diameter must be much larger than 10 micrometers to not be significantly affected by this error. As the laser beam diameter will set the print resolution, this greatly restricts the resolution that can be achieved. Tecnica has defined this error as the Galvanometer Positioning Error, and it has forced printer manufacturers to use a beam diameter in the range of 50-300 micrometers. With Tecnica’s Advanced Galvanometer-Free Lens we can now set the resolution to much lower than ever before and print more durable parts with much higher definition.

Galvanometer Deflection Errors
In addition to resolution errors, the deflection of the Laser beam bouncing off the two Galvanometer mirrors creates three types of distortions on the reflected image:
- Mirror Discrepancy Distortion: The arrangement of the two mirrors leads to a certain distortion of the image field; see Fig. 2 above. This distortion is due to the fact that the distance between mirror 1 and the image field depends on the size of the scan angles of mirror 1 and mirror 2. A larger scan angle leads to a longer distance (when y = max, x travel longest distance).
- Flat Field Distortion: The distance in the image field is not proportional to the scan angle itself, but to the tangent of the scan angle. Therefore, the marking speed of the laser focus in the image field is not proportional to the angular velocity of the corresponding scanner.
- Focus Curve Distortion: If an ordinary lens is used for focusing the laser beam, then the focus lies on a sphere. Projecting the image on a flat field will result in varying spot size (a circle beam will become more elliptical as it gets far from the origin).
Distortions 2 and 3 can be corrected by using an F-Theta lens, which transforms the focus from a sphere to a plane. Mathematically, the F-Theta lens is transforming tan(theta) to theta itself, resulting in L*theta projection as opposed to L*tan(theta).
Galvanometer Intensity Problem
If the aforementioned issues weren’t enough to warrant a new design, Galvanometers also pose a critical problem that pertains to the laser intensity of each pass. Since the Galvanometer rotates each mirror in two directions it must decelerate and then accelerate to change directions between each pass. However, the laser is kept at constant power and when the laser decelerates at the end of each pass it will contact the surface for longer thereby delivering more energy to the bed at those points. The major outcome of this gradient in laser intensity is an uneven sinter leading to a variable lattice structure in the completed print.
Galvanometer Speed:
The Galvanometer is using a closed-loop servo motor that runs back and forth and is limited to a rotation speed of about 2500 Hz. This translates to a linear print bed scan speed of about 6 m/sec. In addition, there is a 5 microradian location error which translates to a 300-micrometer error when using a 360 mm print bed. The larger the print bed the larger the error.
F-Theta Lens Factors
The main function of an F-Theta Lens is to keep the moving beam at a constant speed besides focusing the beam. From the collimated wide beam (about 10-20mm) to about 100 micrometers. Mathematically it is performing a conversion to the beam by tan(angle) into the angle itself. As a result, the beam speed on the flat working table will be constant.
There is also a need to correct the flat field distortion by moving the focus point from a circle to a line (sphere to flat surface). Therefore, a flatfield lens is needed as well to perform the correction.
One of the main contributors to distortion is the Angle Nonlinearity error: this error is a function of the angle and can range from 0 to about 850 microradians and it’s a function of the angle. Some suppliers may provide a lens that performs more functions than just f-theta.
Conclusion
As the 3D printing industry expands, the demand for suitable quality prints at affordable prices has led to new requirements and challenges for SLS/SLM 3D printer manufacturers. This article has explored the optical limitations faced by these manufacturers, with a specific focus on galvanometers used in SLS printing.
Galvanometers play a crucial role in directing the laser beam during the selective laser sintering process. However, their inherent mechanical constraints, limited field of view, thermal distortion, and dynamic response pose challenges to achieving optimal accuracy and quality in 3D printing.
While galvanometers have been instrumental in enabling rapid and precise movement of the laser beam, it is essential to acknowledge their limitations for certain applications. Mechanical wear, backlash, inertia, and thermal expansion can all contribute to reduced dimensional accuracy and surface quality in printed parts.
As the industry continues to evolve and the demand for higher quality and larger-scale prints grows, it becomes imperative for manufacturers to explore alternative solutions or advancements in galvanometer technology. Overcoming these limitations will enable them to meet the evolving needs of various vertical markets that rely on 3D printing for industrial applications such as producing replacement parts for automobiles, rocket components, and heavy-duty tools.
By addressing the challenges associated with galvanometers and pushing the envelope of SLS/SLM 3D printing technology, manufacturers can deliver improved accuracy, repeatability, and surface finish, making the technology more accessible and reliable for a wider range of industrial applications.
In conclusion, while galvanometers have played a significant role in the advancement of SLS/SLM 3D printing, their limitations necessitate ongoing research and innovation to ensure that the industry continues to meet the ever-growing demands for high-quality and precise additive manufacturing.


This article discussed some real issues with galvos, which are omitted by some galvos manufacturers.
Great information. As I shop for a galvo system, there are some parameters that I do not understand how it would affect the printing. These are input aperature and beam displacement that are in the specifications for each galvo. Can you discuss these in your article?
Good point. We will quantify the errors in relation to a 3d print.
Thank you,
Charles
I added a section addressing the input aperture to the galvanometer. please note: beam displacement is indirectly effected by the input aperture as well.
I don’t know much about your application (bed size, print speed, laser energy, laser beam quality etc). But in general in you want to keep the galvos running below 12 degrees to make sure that it is running within the linear error spec.
Thank you,
Charles Bibas